Autolacing Back to the Future shoes
In Back to the Future 2, we were promised autolacing shoes by 2015. I figured I’d do my part and help make it happen.
This video gives a quick demonstration:
And this video goes over it in more detail:
Build your own
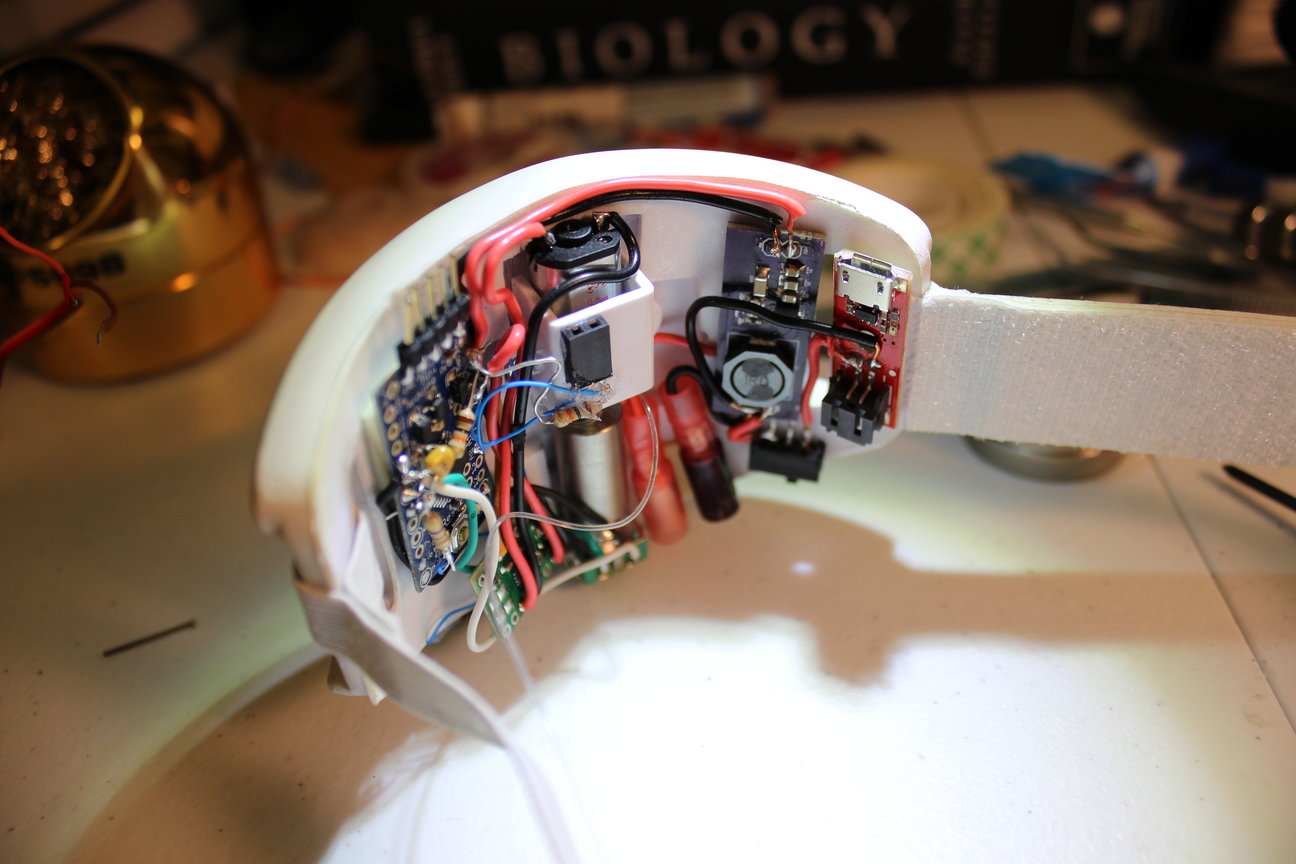
Here are the parts that I used:
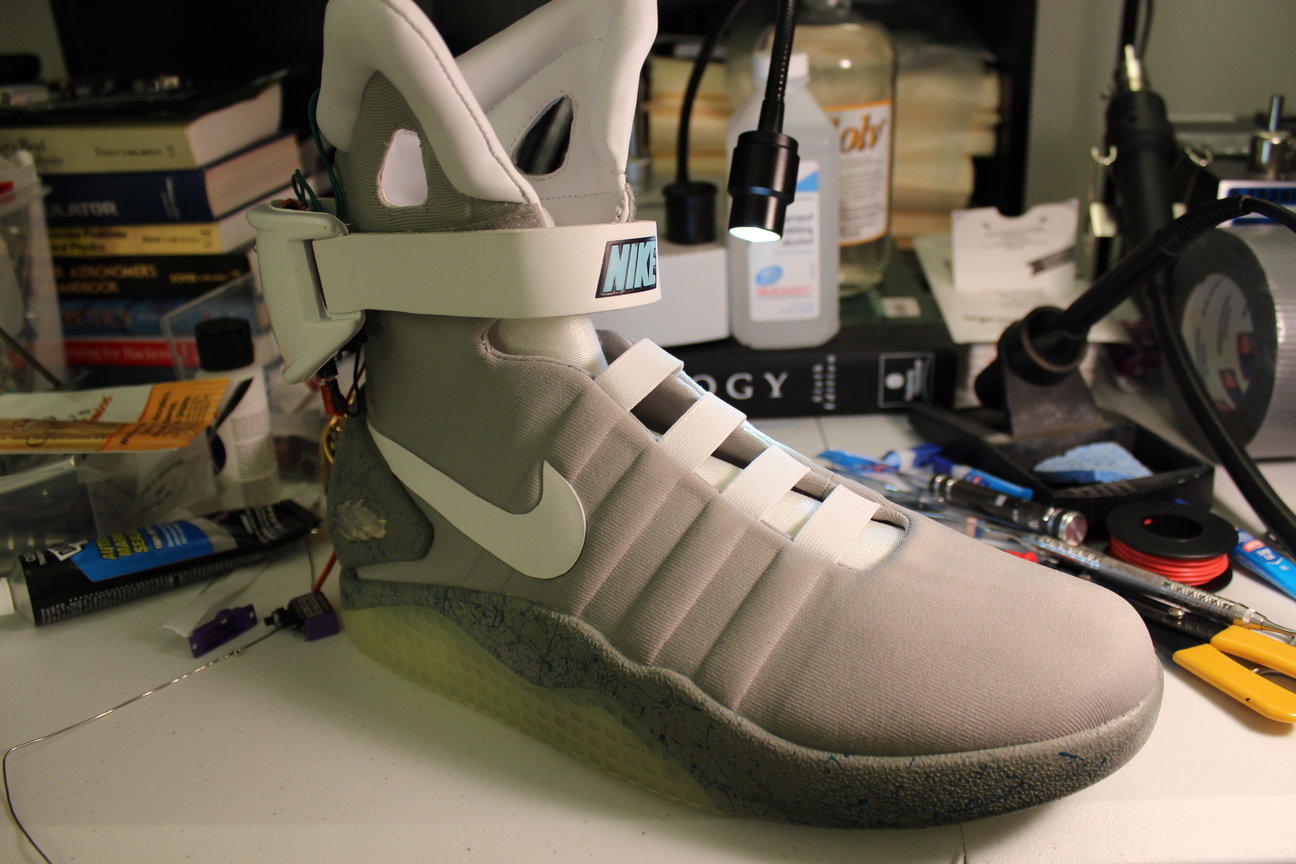
Nike Air Mag shoes
5v Arduino Pro Mini
USB LiPo charger
Force sense resistor
Motor
Motor mount
Motor driver
Battery
Shaft coupler
Rotary encoder
The power supply I designed can be found here, but if you don’t want to build that, you can buy something like this which should also work.
Assembly
Assembly is pretty straightforward. I’m not going to replicate the documentation of each of the components, but basically, you want to use an Xacto knife to carve out a notch in the shoe strap to install the motor, shaft coupler, and encoder. I used 40 lb test fishing line connected from the shoe strap to the motor shaft. This seems to be a good tradeoff between strength and thickness/rigidity of the fishing line. The elastic I used I got from Hobby Lobby, but other craft stores probably have it. I used 3M double sided foam tape to hold all the components down and a little RTV over the wire connections from the button and pressure sensor socket since the 32 gauge wire I used there was getting torn off sometimes. I found that both superglue and 2 part epoxy actually didn’t stick very well to the inside surface of the straps. The rotary encoder is pretty bouncy, and the code does a pretty good job of debouncing, but if you want extra protection, you can add a small low pass filter by putting an RC filter on the input of the encoder to the Arduino.
You can download the Arduino code here.
Commission a pair
If you want a pair of these yourself, the best option is to build your own. However, depending on interest, I might make a few pairs for people who want to just buy a preassembled pair. If you’re interested, fill out this form.
Pingback: Nikes With Power Laces, Just in Time for Next Year
Pingback: Nikes With Power Laces, Just in Time for Next Year - Tech key | Techzone | Tech data
Pingback: Nikes With Power Laces, Just in Time for Next Year | Ad Pub
Pingback: Nikes With Power Laces, Just in Time for Next Year | 0-HACK
Pingback: The Ultimate Guide to the Gadgets of Back to the Future II • Reliable Tech & IT Blog for Everyone
Pingback: Maker builds his own self-lacing sneakers | Atmel | Bits & Pieces
Pingback: Maker builds his own self-lacing sneakers | Atmel Bits & Pieces